(Fixed link) |
|||
| (15 intermediate revisions by 2 users not shown) | |||
| Line 1: | Line 1: | ||
| − | Betrayal in Antara is a Windows 3.1 computer role-playing game developed and published by Sierra On-Line in 1997, after the success of their previous RPG, Betrayal at Krondor. Sierra had lost the rights to produce another game based on Raymond Feist's Midkemia, and therefore had to create the game world of Ramar. Although it is not a sequel, Betrayal in Antara uses an updated version of Betrayal at Krondor's game engine. |
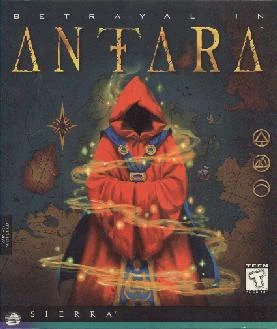
+ | [[File:BIAbox.jpg|thumb]]Betrayal in Antara is a Windows 3.1/95 computer role-playing game developed and published by Sierra On-Line in 1997, after the success of their previous RPG, Betrayal at Krondor. Sierra had lost the rights to produce another game based on Raymond Feist's Midkemia, and therefore had to create the game world of Ramar. Although it is not a sequel, Betrayal in Antara uses an updated version of Betrayal at Krondor's game engine. |
| + | |||
| − | Contents |
||
| + | Related texts include the [http://www.sierrahelp.com/Documents/Manuals/Betrayal_in_Antara_-_Manual.pdf official guidebook], containing [[a Brief History of Antara]], and [[The Tale of the Sword, the Flask, and the Pebble]], released for free on the Sierra website as a tie-in to the game. |
||
==Gameplay== |
==Gameplay== |
||
| Line 19: | Line 20: | ||
==Major characters and NPCs== |
==Major characters and NPCs== |
||
===Playable characters=== |
===Playable characters=== |
||
| − | *[[William Escobar]] (Chapters 1, 2, 3, 4, 6, 8, 9) |
+ | *[[William Escobar]] (Chapters 1, 2, 3, 4, 6, 8, 9) |
*[[Aren Cordelaine]] (Chapters 1, 2, 3, 4, 6, 8, 9) |
*[[Aren Cordelaine]] (Chapters 1, 2, 3, 4, 6, 8, 9) |
||
| − | *[[Kaelyn Usher]] (Chapters 1, 2, 3, 5, 7, 8, 9) |
+ | *[[Kaelyn Usher]] (Chapters 1, 2, 3, 5, 7, 8, 9) |
*[[Raal]] (Chapters 5, 7) |
*[[Raal]] (Chapters 5, 7) |
||
===Other characters=== |
===Other characters=== |
||
| ⚫ | |||
| ⚫ | |||
| ⚫ | |||
| ⚫ | |||
| ⚫ | |||
| ⚫ | |||
| ⚫ | |||
| ⚫ | |||
| ⚫ | |||
| + | ==Plot== |
||
| ⚫ | |||
| − | Calvert Bryce is the Sheffields' court magician. Bryce discovered how to travel into the ethereal world but was humiliated when he was forbidden from conducting research on the subject by the Shadows, the Emperor's court magicians. Desiring revenge, he engineers an elaborate plot with a man named Petrov to get revenge by capturing a wraith and using it to assassinate the Emperor. Bryce blames the Shadows for the crimes he commits, holding them responsible due to their rejection of his work. |
||
| ⚫ | |||
| ⚫ | |||
| − | Lord Caverton is governor of Ticor and a political rival of both House Escobar and House Sheffield. With the recent discovery of salt mines in Ticor, Lord Caverton has positioned himself to undermine Lord Sheffield and drive him out of business. |
||
| ⚫ | In the prologue, a ship, the [[Fair Current]], is sailing from [[Januli]] to [[Pianda]] when it is attacked by pirates. With the ship on fire, the crew and its two passengers abandon ship. [[William Escobar]] finds himself in the same lifeboat as the other passenger, a joyman named [[Gregor]]. The two of them make it to shore but are attacked by a magical [[griffin]] and Gregor is mortally wounded. While fishing, [[Aren Cordelaine]] sees William fighting off the griffin and, trying to help, unintentionally kills the creature with a blast of magic. Before dying, Gregor gives William a medallion and whispers a cryptic warning about "the Consort." William insists that Aren accompany him home to learn how to control his newfound powers from the Escobars' court mage [[Finch]]. Aren agrees and the two of them set out for [[Panizo]]. |
||
| ⚫ | |||
| − | Prince Farril Kalibanque, third son of the Emperor of Chail, is engaged to Princess Aurora Valorian, daughter of Emperor Justin Valorian. He is traveling to Antara for his marriage to Princess Aurora when he is kidnapped in Ticoro by the Shepherds. William and Aren eventually rescue him, but not before he is used by Calvert Bryce to conceal a wraith meant to assassinate the emperor. |
||
| + | The game begins near Aren's home town, [[Briala]]. In the forest near town, they save an archer, [[Kaelyn Usher]], who is being attacked by bandits while transporting pelts to [[Aspreza]]. To even the score, she decides to join them and see them safely on their way. |
||
| ⚫ | |||
| − | Gregor is a joyman (a traveling minstrel) and a spy for Lord Caverton in Januli. Gregor discovered Selana Sheffield's plot to kidnap the Imperial Consort and was traveling to Ticoro to warn him when his ship was attacked by pirates. Abandoning ship, he ends up in the same lifeboat as William Escobar. The two are attacked by a griffin upon reaching shore and Gregor is mortally wounded, warning William that the Consort is in danger before he dies. |
||
| + | Journeying west, the three eventually reach Panizo, where William informs his father, Lord [[Nathan Escobar]], of Aren's help as well as Gregor's message. Learning that the Consort will be traveling to [[Antara (city)]] for his wedding to the [[Justin Valorian V|Emperor's]] Daughter-heir, [[Aurora Valorian]], William asks leave to go to [[Ticoro]] and warn him. Nathan tells him to take Aren to [[Midova]] to be trained by Finch, but does not explicitly prohibit them from going to Ticoro afterwards. |
||
| ⚫ | |||
| − | High Brother Fellich Marr is head of the Church of Henne and is trusted by both the royal family and the Sheffields, as Aurora Valorian and Selana Sheffield both fostered at the Tabernacle of Henne in Ticoro. He is also Silver Hawk, the mastermind behind Selana Sheffield and Calvert Bryce's activities. Fellich Marr wanted the Emperor assassinated so that Princess Aurora would ascend to the throne as empress, thereby increasing his own political influence within the Empire. |
||
| ⚫ | |||
| ⚫ | |||
| − | Lord Sheffield is governor of Januli and Selana Sheffield's father. With the rise in pirate attacks on the high seas and Lord Caverton's entry into the salt trade, Lord Sheffield has found his family in a precarious financial position. |
||
| + | William, Aren, and Kaelyn sneak out of Panizo early the next morning and travel to Midova. Though Finch takes the time to teach Aren some magical control, he refuses to take him on as an apprentice just yet. Balked, but determined to warn the Consort of Gregor's message, the party heads west and arrives in Ticoro in the middle of the [[Spring Festival]]. |
||
| ⚫ | |||
| − | Selana Sheffield is Lord Sheffield's daughter and William Escobar's fiancée, though the two don't care much for each other or their politically-motivated marriage. Selana believes that her father sees her as a silly girl only good to be married off and resents him for it. She is secretly a member of the Shepherds, though she doesn't believe in their cause and only sees them as a means by which she can solve House Sheffield's financial troubles, using them kidnap the Imperial Consort and holding him for ransom. She also hopes that by kidnapping the Consort, she would politically embarrass her family's rival Lord Caverton, who has the responsibility of looking after the Consort during his stay in Ticoro. |
||
| ⚫ | |||
| ⚫ | |||
| − | Kaelyn's father Garvin is a magician, though Kaelyn is unaware of this fact. His wife was killed when one of his magical experiments gone awry and, ashamed of telling his daughter, he gave up magic and told Kaelyn her mother had drowned. When wraiths appear in the Ridgewood, Garvin is forced to take up magic again in order to find a way to defeat them and reveals the truth to his daughter, helping her to defeat them. |
||
| ⚫ | In Ticoro, William, Aren, and Kaelyn meet Kaelyn's friend [[Raal]], William's potential [[Cameron Sheffield|father-in-law]] and [[Selana Sheffield|fiancée]] who are in town for the Festival, and High Brother [[Fellich Marr]], head of the church of [[Henne]]. They discover where the Consort is staying and attempt to warn him, but both [[Caverton|the Ticoran governor]] and the prince's guards ignore them, though they do learn that Gregor's medallion refers to a group called the [[Shepherds (cult)|Shepherds]]. William, Aren, and Kaelyn return to their inn in frustration, but are routed from their beds in the middle of the night by the governor's guards, who inform them that the Consort has been kidnapped and arrest them as the primary suspects. |
||
| ⚫ | |||
| − | Petrov is the man who secretly serves as a proxy for Fellich Marr, though this not revealed until the end of the story. Before the beginning of the story, Petrov separately approaches Selana Sheffield and Calvert Bryce, knowing that their personal agendas meshed well with his own mission. Selana has the connections (and the desperation) needed to kidnap the Imperial Consort while Bryce has the potential means to assassinate the Emperor under the noses of the Shadows, the Emperor's ever-vigilant court magicians. The plan involves kidnapping the Consort so that a wraith may be placed inside his body. Once the Consort was close to the Emperor, the wraith would attack and steal the Emperor's soul. With the Consort and the Emperor dead, Princess Aurora (as the new ruler) would be vulnerable to the manipulations of Petrov's master. The deed went awry when Princess Aurora's soul is stolen instead of the Emperor's. Fellich then orders Petrov to kill Selana and Bryce before they confess their deeds to anyone. Petrov is killed by Lord Cameron Sheffield as he attempts to murder Selana. |
||
| − | == |
+ | ===Chapter 4=== |
| + | After a fruitless interview with the gloating Ticoran governor, the party is shipped west to be questioned by the Emperor's [[Shadows]]. However, Raal springs them from captivity along the road. Raal informs Kaelyn that [[Wraiths]] have appeared and are attacking people in the [[Ridgewood]] and that her father [[Garvin Usher]] has disappeared. Kaelyn leaves with Raal and heads north to find her father, promising to rejoin the party after seeing him. William and Aren continue the chapter alone. |
||
| ⚫ | |||
| ⚫ | |||
| + | Suspecting that the Shepherds were responsible for the kidnapping, and follow the cult's trail through [[Ticor]] and [[Chuno]], eventually learning the location of their secret headquarters. Tracking down another Shepherd medallion, they use it to enter the [[Shepherd Cave|Shepherd Headquarters]] north of Ticoro. |
||
| − | The game begins near Briala. While fishing, Aren Cordelaine sees William fighting off the griffin and, trying to help, unintentionally kills the creature with a blast of magic. Before he dies, Gregor gives William a medallion and warns him that the Imperial Consort is in danger. William asks Aren to accompany him home so Aren can learn how to control his powers from the Escobars' court mage Finch. Aren agrees and the two of them set out for Panizo. In the forest near town, they save a woman, Kaelyn Usher, who is being attacked by bandits and she decides to join them. Journeying west, they eventually reach Panizo, where William informs his father of Aren's help as well as Gregor's message. Learning that Prince Farril will be traveling to Antara for his wedding to Princess Aurora, William wants to go to Ticoro and warn him. Nathan Escobar allows Aren to be trained by Finch, but does not explicitly permit William to go to Ticoro. |
||
| ⚫ | |||
| − | William, Aren, and Kaelyn sneak out of Panizo early the next morning and head north to Midova, where Aren starts his magical training with Finch. They then head west and arrive in Ticoro in the middle of the spring festival and learn that Prince Farril is in the city, though his location is being kept a secret. |
||
| ⚫ | |||
| − | |||
| ⚫ | In Ticoro, William, Aren, and Kaelyn meet Kaelyn's |
||
| − | ===Chapter 4=== |
||
| − | |||
| − | Raal springs William, Aren, and Kaelyn from prison and the four of them escape from Ticoro. Raal informs Kaelyn that wraiths have appeared and are attacking people in the Ridgewood and her father Garvin has disappeared. Kaelyn leaves with Raal and heads north to find her father, promising to meet up with William and Aren when she is done. William and Aren suspect that the Shepherds were responsible for kidnapping Prince Farril and follow the trail of the Shepherds through Ticor and Chuno, eventually learning about their secret headquarters. Tracking down another Shepherd medallion, they use it to enter the Shepherds' headquarters north of Ticoro. |
||
===Chapter 5=== |
===Chapter 5=== |
||
| − | Kaelyn |
+ | Kaelyn, musing on her childhood friendship with Raal, accompanies him north to her father's home in the Ridgewood. Following a note from her father, the two of them discover Garvin's magical workshop in a cave. Finally revealing to his daughter that he was once a mage -- along with the truth about her mother's untimely death -- Garvin explains that he has been working to find an enchantment to kill the Wraiths that have been stealing souls and driving their victims mad. With Garvin's help, Kaelyn and Raal find and destroy all the wraiths in the forest, and Kaelyn begins to come to terms with the new information about her past. |
| + | |||
===Chapter 6=== |
===Chapter 6=== |
||
| − | William and Aren |
+ | In the Shepherds' headquarters, William and Aren shake down [[Gar Warren|the cult's leader]] and learn that the kidnapped Consort has disappeared, taken from the Shepherds by a traitorous mage who attacks the party as well but is killed before anything else can be revealed. When the leader escapes in the tunnels, leaving William and Aren with no proof that they weren't in on the kidnapping, William decides they have no choice but to rescue the Consort themselves. Following the only clue they have, the name [[Kahleth]], they discover that Farril has been taken by a band of [[Ghan]]ish mercenaries. Posing as new recruits, they are taken to the cabin where he is being held in a magical sleep. After Aren dispels the enchantment, the three flee west toward Antara. |
| + | |||
===Chapter 7=== |
===Chapter 7=== |
||
| + | Bidding farewell to Kaelyn's father, Kaelyn and Raal search for William and Aren, following the trail of destruction they've left through Chuno with Khaleth's mercenaries in pursuit. Finding the three trapped near Ciaga Pass, they create a distraction to let them flee for Antara, following behind them. |
||
| − | William, Aren, and Farril head south to Antara with the mercenaries in pursuit, leading a trail of destruction in their wake. Bidding farewell to her father, Kaelyn and Raal head south to meet up with them, eventually finding them trapped near Ciaga Pass. After helping them escape through the pass, Raal returns home while William, Aren, Kaelyn, and Farril continue on to Antara. The Imperial guards are suspicious but, finding no holes in their story, let them go. |
||
| + | |||
| + | When they reach Antara, Raal bids Kaelyn farewell and she rejoins her other companions. Though relieved to have the Consort back unharmed, the Imperial Guards take them in for questioning. |
||
| + | |||
===Chapter 8=== |
===Chapter 8=== |
||
| − | Antara gathers for the presentation of |
+ | After the party is cleared, all of Antara gathers for the presentation of the Consort to the Imperial Court. During the ceremony, a Wraith bursts from the Consort's body and tries to attack the Emperor. The Imperial Shadows fight it off but the creature takes the souls of the Consort and Daughter-Heir and escapes from the palace. The Shadows place the two victims in stasis and the Emperor asks William, Aren, and Kaelyn to find the Wraith and save them. Realizing that Gregor's death was the first piece of the mystery, they head to Januli to find his killer. |
| + | |||
| + | Scouring Januli for the details of Gregor's life, the party is led to [[Havesly]], home of William's fiancée. More than a simple joyman, Gregor had been spying on Lord Sheffield in furtherance of Lord Caverton's attempt to bankrupt the Sheffields. Nonetheless, as a loyal Imperial subject, he had embarked to warn the Consort upon discovering the kidnapping plot. Heading for the Sheffields' estate to learn more, the party finds it under attack by pirates. |
||
| − | Tracking down the Fair Current's crew members as well as Gregor's mistress, William, Aren, and Kaelyn learn that Gregor spent much of his time in Havesly, the capital of Januli. They head to Havesly, where they discover that Gregor was a spy for Lord Caverton, whose entry into the salt trade was driving House Sheffield to the brink of bankruptcy. Desperate to save her family from financial ruin, Selana Sheffield employed pirates, allowing them harbor in Januli by forging her father's signature. Selana planned to kidnap Prince Farril and hold him for ransom, joining the Shepherds to carry it out. Gregor discovered her plans so she arranged to have him killed. William, Aren, and Kaelyn arrive at the Sheffields' castle to find it under attack by pirates. |
||
===Chapter 9=== |
===Chapter 9=== |
||
| − | + | Entering the estate, dispatching pirates on the way, the party eventually learns why the Consort had been kidnapped and that the pirates had been sent to keep Gregor from warning him of impending danger. However, the Shepherds had known nothing about the griffin and Wraith, both magical creatures, and had never intended to endanger the Emperor. Searching for the mage behind the assassination attempt, William, Aren, and Kaelyn enter the salt mines behind the castle and follow them into the [[Waste]]. |
|
| + | Deep in the Waste, the party finds the [[Calvert Bryce|mage's]] workshop and fight off his attacks. Dying, he reveals that he had intended the Emperor's assassination to embarrass the Shadows for forbidding his research into [[Etherea|Ethereal travel]]. He continued anyway, accidentally releasing Wraiths into the Ridgewood, and a convenient [[Petrov|ally]] had provided the kidnapped Consort to be unknowingly used as a vessel for his revenge against the Shadows. Aren, using the mage's notes, is able to summon the Wraith and bargain for the souls of the Consort and Daughter-Heir. Though the Wraith refuses at first, demanding an equal exchange, the rescue is finally achieved. |
||
| − | Bryce tells them that he tried to kill the Emperor out of revenge because the Shadows had humiliated him when they forbade his ethereal travel research. He continued anyway, but by traveling to the ethereal world to capture a wraith, Bryce allowed a few to escape into Ramar, where they appeared in the Ridgewood. Selana's plan to kidnap the Consort happened to provide a vessel for the wraith to strike at the Emperor. Before they can learn how to get Farril and Aurora's souls back, Bryce commits suicide. Using Bryce's notes, Aren is able to summon the wraith. The wraith refuses to return the souls so Lord Sheffield and Selana, feeling responsible for the turmoil that has occurred, volunteer to give up their souls instead. The wraith takes their souls, killing them, and returns Farril and Aurora's souls in exchange for the promise that humans will never disturb the wraiths again. |
||
| − | + | In the Epilogue two months later, William, Aren, and Kaelyn reunite in Ticoro for the Imperial wedding. William has been given more responsibility in his family, Aren has become Finch's apprentice, and Kaelyn is now a confidant of the Daughter-Heir and has been appointed ambassador to the [[Grrrlf]]. But during the ceremony, Aren notices a clue to the identity of the conspirator who had set both plots into motion -- a conspirator who, for lack of remaining evidence, has little to fear from anyone attempting to connect him to the attempted assassination. The party can do nothing now, but resolve to make sure the villain can do no more harm. |
|
==Reception== |
==Reception== |
||
| Line 98: | Line 96: | ||
Since Betrayal in Antara uses an updated version of Betrayal at Krondor's game engine with some modifications, gameplay is largely the same. The game runs in 256-color 640x480 Super VGA mode within Windows 3.1. The graphics engine uses textured 3D graphics to draw the terrain and uses sprites for most detailed objects. Shops, inns, temples, special locations, and large cities are done as pictures usable through hotspots. Smaller towns have 3D buildings. Character, NPC, and monster art is based on hand-drawn images. In combat and puzzle screens, all characters are animated. The game models illumination to a certain extent: in the overworld, day and night are modeled, and in underground locations, the player needs to use a torch or light spell to illuminate the surroundings. |
Since Betrayal in Antara uses an updated version of Betrayal at Krondor's game engine with some modifications, gameplay is largely the same. The game runs in 256-color 640x480 Super VGA mode within Windows 3.1. The graphics engine uses textured 3D graphics to draw the terrain and uses sprites for most detailed objects. Shops, inns, temples, special locations, and large cities are done as pictures usable through hotspots. Smaller towns have 3D buildings. Character, NPC, and monster art is based on hand-drawn images. In combat and puzzle screens, all characters are animated. The game models illumination to a certain extent: in the overworld, day and night are modeled, and in underground locations, the player needs to use a torch or light spell to illuminate the surroundings. |
||
| + | [[Category:Betrayal in Antara]] |
||
Revision as of 23:19, 16 October 2018
Betrayal in Antara is a Windows 3.1/95 computer role-playing game developed and published by Sierra On-Line in 1997, after the success of their previous RPG, Betrayal at Krondor. Sierra had lost the rights to produce another game based on Raymond Feist's Midkemia, and therefore had to create the game world of Ramar. Although it is not a sequel, Betrayal in Antara uses an updated version of Betrayal at Krondor's game engine.
Related texts include the official guidebook, containing a Brief History of Antara, and The Tale of the Sword, the Flask, and the Pebble, released for free on the Sierra website as a tie-in to the game.
Gameplay
The player, controlling a small party of characters, is generally allowed to explore the world as they wish, but only certain locations are accessible in each chapter. Compared to Betrayal at Krondor, Betrayal in Antara is more linear and restricted in where the player can travel. Plot is usually advanced through literary cutscenes. Each chapter begins and ends with a cutscene, consisting of text, spoken dialogue, and illustrations.
Most gameplay happens in the first-person 3D view of the game world. Aside from the overworld, there are also dungeons and caves to explore. There is also a 2D overhead map view, where the player is represented by a circular arrow marker. The map view is stationary while the player marker moves around; when the player reaches the edge of one map section, the next is loaded. The player also has the option to automatically mark shops, inns, temples, NPCs, chests, and other objects on the overhead map. During travel, the player may encounter enemies, at which point the game enters a separate combat screen, which is viewed in the third person. The player also may meet various NPCs throughout their travels. Dialogue is text-based with speech, and some NPCs have their own portraits as well. Conversation is tree-based. This is often used to get information, training, and items from NPCs. The game also includes a recall tool so that conversations with certain important NPCs can be played back later in the game.
Just like Betrayal at Krondor, combat is turn-based and takes place on a hexagonal grid. During their turn a character can has multiple options, including but not limited to moving, attacking, casting a spell, and resting to regain stamina, which is used when a character attacks or is attacked. Once stamina is depleted, health is used and as it decreases, the character's skills (such as weapon accuracy and defense) are negatively affected. Characters have different melee options trading damage for accuracy. A fighter equipped with a bow or a magician with spells can attack from a distance.
Characters can acquire various status effects. Characters whose health drops to zero in combat are knocked out and acquire "Near Death" status, making them heal very slowly and extremely ineffective in combat; if wounds are properly cared for (using herbal packs or senwater), they will heal faster. Improved rate of healing is handled as a status effect, as are poisoning, drunkenness, and fatigue. If the entire party is near death, the game will end.
Each character has a set of skills. Skills are generally improved by using them. For example, fixing weapons will improve the Repair skill, which in turn will make the character more effective at fixing weapons in the future. Skills include defense, archery, mêlée weapon accuracy, spellcasting accuracy, enemy assessment during combat, weapon and armor repair, haggling, lockpicking, scouting for enemy ambushes, and stealth. Skills can be emphasized, causing them to improve faster. There are items which can improve skills both permanently (such as books) or temporarily (such as blood of Kor for melee accuracy or razorcup nectar for archery).
Spells are organized into six groups, grouped by magic symbol. Five groups of spells are combat spells and one group is non-combat spells. Spells first drain the caster's stamina and then health. Some spells have variable strength; the player can choose how much energy the spell consumes. Some combat spells also require that the target being within line of sight of or adjacent to the caster. Magic is learned from books that are sold in shops or found in various locations throughout the world. Aren can select up to five types of magic to research, which automatically occurs when resting. As Aren's skills within the various magical disciplines increases, he gains access to more spells.
Just as Betrayal at Krondor had moredhel wordlock chests, Betrayal in Antara has lever chests and beadlock chests. Lever chests have combination locks with letters and a riddle whose answer will open the chest if spelled out. However, unlike Betrayal at Krondor, in which the riddles were usually unrelated to Midkemia, many of the riddles in Betrayal in Antara require knowledge about the inhabitants, politics, creatures, etc. of Ramar. Beadlock chests have a puzzle in which the player is given a set of colored beads and exchange formulas and must obtain a certain combination of colored beads.
Major characters and NPCs
Playable characters
- William Escobar (Chapters 1, 2, 3, 4, 6, 8, 9)
- Aren Cordelaine (Chapters 1, 2, 3, 4, 6, 8, 9)
- Kaelyn Usher (Chapters 1, 2, 3, 5, 7, 8, 9)
- Raal (Chapters 5, 7)
Other characters
- Calvert Bryce
- Lord Daryl Caverton
- Farril Kalibanque (the Imperial Consort)
- Gregor
- Fellich Marr
- Lord Cameron Sheffield
- Selana Sheffield
- Garvin Usher
- Petrov
Plot
Chapter 1
In the prologue, a ship, the Fair Current, is sailing from Januli to Pianda when it is attacked by pirates. With the ship on fire, the crew and its two passengers abandon ship. William Escobar finds himself in the same lifeboat as the other passenger, a joyman named Gregor. The two of them make it to shore but are attacked by a magical griffin and Gregor is mortally wounded. While fishing, Aren Cordelaine sees William fighting off the griffin and, trying to help, unintentionally kills the creature with a blast of magic. Before dying, Gregor gives William a medallion and whispers a cryptic warning about "the Consort." William insists that Aren accompany him home to learn how to control his newfound powers from the Escobars' court mage Finch. Aren agrees and the two of them set out for Panizo.
The game begins near Aren's home town, Briala. In the forest near town, they save an archer, Kaelyn Usher, who is being attacked by bandits while transporting pelts to Aspreza. To even the score, she decides to join them and see them safely on their way.
Journeying west, the three eventually reach Panizo, where William informs his father, Lord Nathan Escobar, of Aren's help as well as Gregor's message. Learning that the Consort will be traveling to Antara (city) for his wedding to the Emperor's Daughter-heir, Aurora Valorian, William asks leave to go to Ticoro and warn him. Nathan tells him to take Aren to Midova to be trained by Finch, but does not explicitly prohibit them from going to Ticoro afterwards.
Chapter 2
William, Aren, and Kaelyn sneak out of Panizo early the next morning and travel to Midova. Though Finch takes the time to teach Aren some magical control, he refuses to take him on as an apprentice just yet. Balked, but determined to warn the Consort of Gregor's message, the party heads west and arrives in Ticoro in the middle of the Spring Festival.
Chapter 3
In Ticoro, William, Aren, and Kaelyn meet Kaelyn's friend Raal, William's potential father-in-law and fiancée who are in town for the Festival, and High Brother Fellich Marr, head of the church of Henne. They discover where the Consort is staying and attempt to warn him, but both the Ticoran governor and the prince's guards ignore them, though they do learn that Gregor's medallion refers to a group called the Shepherds. William, Aren, and Kaelyn return to their inn in frustration, but are routed from their beds in the middle of the night by the governor's guards, who inform them that the Consort has been kidnapped and arrest them as the primary suspects.
Chapter 4
After a fruitless interview with the gloating Ticoran governor, the party is shipped west to be questioned by the Emperor's Shadows. However, Raal springs them from captivity along the road. Raal informs Kaelyn that Wraiths have appeared and are attacking people in the Ridgewood and that her father Garvin Usher has disappeared. Kaelyn leaves with Raal and heads north to find her father, promising to rejoin the party after seeing him. William and Aren continue the chapter alone.
Suspecting that the Shepherds were responsible for the kidnapping, and follow the cult's trail through Ticor and Chuno, eventually learning the location of their secret headquarters. Tracking down another Shepherd medallion, they use it to enter the Shepherd Headquarters north of Ticoro.
Chapter 5
Kaelyn, musing on her childhood friendship with Raal, accompanies him north to her father's home in the Ridgewood. Following a note from her father, the two of them discover Garvin's magical workshop in a cave. Finally revealing to his daughter that he was once a mage -- along with the truth about her mother's untimely death -- Garvin explains that he has been working to find an enchantment to kill the Wraiths that have been stealing souls and driving their victims mad. With Garvin's help, Kaelyn and Raal find and destroy all the wraiths in the forest, and Kaelyn begins to come to terms with the new information about her past.
Chapter 6
In the Shepherds' headquarters, William and Aren shake down the cult's leader and learn that the kidnapped Consort has disappeared, taken from the Shepherds by a traitorous mage who attacks the party as well but is killed before anything else can be revealed. When the leader escapes in the tunnels, leaving William and Aren with no proof that they weren't in on the kidnapping, William decides they have no choice but to rescue the Consort themselves. Following the only clue they have, the name Kahleth, they discover that Farril has been taken by a band of Ghanish mercenaries. Posing as new recruits, they are taken to the cabin where he is being held in a magical sleep. After Aren dispels the enchantment, the three flee west toward Antara.
Chapter 7
Bidding farewell to Kaelyn's father, Kaelyn and Raal search for William and Aren, following the trail of destruction they've left through Chuno with Khaleth's mercenaries in pursuit. Finding the three trapped near Ciaga Pass, they create a distraction to let them flee for Antara, following behind them.
When they reach Antara, Raal bids Kaelyn farewell and she rejoins her other companions. Though relieved to have the Consort back unharmed, the Imperial Guards take them in for questioning.
Chapter 8
After the party is cleared, all of Antara gathers for the presentation of the Consort to the Imperial Court. During the ceremony, a Wraith bursts from the Consort's body and tries to attack the Emperor. The Imperial Shadows fight it off but the creature takes the souls of the Consort and Daughter-Heir and escapes from the palace. The Shadows place the two victims in stasis and the Emperor asks William, Aren, and Kaelyn to find the Wraith and save them. Realizing that Gregor's death was the first piece of the mystery, they head to Januli to find his killer.
Scouring Januli for the details of Gregor's life, the party is led to Havesly, home of William's fiancée. More than a simple joyman, Gregor had been spying on Lord Sheffield in furtherance of Lord Caverton's attempt to bankrupt the Sheffields. Nonetheless, as a loyal Imperial subject, he had embarked to warn the Consort upon discovering the kidnapping plot. Heading for the Sheffields' estate to learn more, the party finds it under attack by pirates.
Chapter 9
Entering the estate, dispatching pirates on the way, the party eventually learns why the Consort had been kidnapped and that the pirates had been sent to keep Gregor from warning him of impending danger. However, the Shepherds had known nothing about the griffin and Wraith, both magical creatures, and had never intended to endanger the Emperor. Searching for the mage behind the assassination attempt, William, Aren, and Kaelyn enter the salt mines behind the castle and follow them into the Waste.
Deep in the Waste, the party finds the mage's workshop and fight off his attacks. Dying, he reveals that he had intended the Emperor's assassination to embarrass the Shadows for forbidding his research into Ethereal travel. He continued anyway, accidentally releasing Wraiths into the Ridgewood, and a convenient ally had provided the kidnapped Consort to be unknowingly used as a vessel for his revenge against the Shadows. Aren, using the mage's notes, is able to summon the Wraith and bargain for the souls of the Consort and Daughter-Heir. Though the Wraith refuses at first, demanding an equal exchange, the rescue is finally achieved.
In the Epilogue two months later, William, Aren, and Kaelyn reunite in Ticoro for the Imperial wedding. William has been given more responsibility in his family, Aren has become Finch's apprentice, and Kaelyn is now a confidant of the Daughter-Heir and has been appointed ambassador to the Grrrlf. But during the ceremony, Aren notices a clue to the identity of the conspirator who had set both plots into motion -- a conspirator who, for lack of remaining evidence, has little to fear from anyone attempting to connect him to the attempted assassination. The party can do nothing now, but resolve to make sure the villain can do no more harm.
Reception
Betrayal in Antara was poorly received by fans of Betrayal at Krondor for a variety of reasons. Without Feist's existing universe, Betrayal in Antara suffered from a weak and complicated plot due to the lack of background information about the world of Ramar. Many of the quests in the game were also considered trivial and silly. For example, one main quest involves significant traveling to find tea for a mage who refuses to train Aren without it. The game was not written for Windows 95 but for Windows 3.1, an operating system with little support for games. As a result, it suffered from both substandard graphics for its time and poor performance. The 3-D world had very few polygons: "forests" in the game were not recognizable as such, as they consisted of flat walls with a forest-camouflage texture. Many of the scenes (and all of the dialogue) consist of static comic-book-like drawings of characters. The game only supported 8-bit color so under 16-bit color or 32-bit color resolutions, darkness (such as nighttime or a cavern) would appear bright purple. As the world map was loaded in sections, occasionally a section would not load properly, requiring the player to backtrack and re-enter in order to move to the next area of the map. The game was also much more limited, including restrictions on travel (many parts of Ramar are only accessible in one chapter) and player development (each chapter had a limit on maximum character stats). The computer AI was also poor, as enemies had a tendency to run away in battle, even while having full health and being uninjured.
GameSpot gave Betrayal in Antara a score of 6.6/10, commenting that despite being "one of the first RPGs to utilize high-resolution SVGA graphics, the graphics are, frankly, as ugly as an orc." Although the story was well-developed, it was "perhaps one of the most linear RPGs ever made" with the gameplay "more than a little frustrating." However, they praised the interface and skill systems as being "topnotch."[1]
Development
Since Betrayal in Antara uses an updated version of Betrayal at Krondor's game engine with some modifications, gameplay is largely the same. The game runs in 256-color 640x480 Super VGA mode within Windows 3.1. The graphics engine uses textured 3D graphics to draw the terrain and uses sprites for most detailed objects. Shops, inns, temples, special locations, and large cities are done as pictures usable through hotspots. Smaller towns have 3D buildings. Character, NPC, and monster art is based on hand-drawn images. In combat and puzzle screens, all characters are animated. The game models illumination to a certain extent: in the overworld, day and night are modeled, and in underground locations, the player needs to use a torch or light spell to illuminate the surroundings.